Monday, September 21, 2015

The Washington State Fair...


Last weekend, after much begging, I finally got Tyler to agree (against his will) to take me to the Washington State Fair in Puyallup.

Side note: for those of you not from the upper left corner of the country, this town is actually pronounced Pew-allup, not Pooy-allup like I originally thought.  The locals (aka my husband and his family) got a good chuckle out of my mispronunciation...but that's ok, they butchered some good ole Massachusetts names a few months ago, so we're even!

Anyhow, it was opening day at the fair, and a Friday. At rush hour. An hour long drive.  The fair is known for being loaded with hoards of people.  Not really something he wanted to subject himself to, but he was a good husband and humored me. The good news is that we hit very little traffic, parking was simple, and that the hoards hadn't yet arrived (it was opening day after all).

My initial desire to attend the fair was the rodeo flyer I saw posted in the grocery store.  Coming from the Northeast, we don't have too much of a rodeo culture, so this would be my first rodeo! But the fair had soooo much more to offer that I didn't even know about.  But I'll get to that in a minute.

The rodeo was fascinating, just as I had thought it would be. I am always fascinated by the athleticism of horses, as I mentioned in my post about Polo a few weeks back. But what Polo offers the viewer in pomp and circumstance, the rodeo offers in rough and tumble.  It is fast, with an ever present hint of danger, and there ain't nothin' fancy about it (well except for the sequined horse bums with equally bedazzled cowgirls that ride around the ring flying sponsor flags...).  The bucking broncos and  kid's sheep races were among the highlights.  I wasn't a fan of the wrangling events however, it seemed rather mean to chase, rope and throw down the baby cows.  The animal lover in me was a tad horrified.  My favorite event of all was the barrel racing.  If you're not familiar with it, check out the video below that I found on YouTube (we were too far to get a good video).  It's these kick-ass cowgirls riding some seriously nimble horses around 3 barrels in the ring as fast as they can.  Let me tell you, it was so exciting and awe inspiring.


Kids Sheep Riding


Look at the horse bucking!

After the rodeo, we stopped into the agriculture exhibit where we saw some of the most amazing plants I've ever seen.  The prize winning dahlias were a highlight for sure, as were the succulents and the produce displays. 


On the way from the agricultural center we stopped for some sinful snacks.  Ultimately I chose my standard fair favorite, cotton candy.  But the Puyallup Fair is famous for their fruit filled scones, oddly enough.  I regretted not trying one on our way out, but luckily one of Ty's co-workers brought one for us to try a couple of days later, and man was it out of this world delish, and that was day old, I can't even imagine how good it would've been fresh from the oven! Check out the recipe I found online below! 
We searched long and hard through the enormous fair grounds for a little place called the Piglet Palace, because I couldn't miss out on all the piggy goodness, they are the cutest! Along the way we stumbled into the Horse stables where we saw some adorable sheep & goats:

We also stook a walk through the horse stalls, where we saw Belgian horses who's backs stood over 7 feet tall and Clydesdale's wearing their white furry boots! Lot's of other breeds as well.

I love how all of the horses turned and posed for my photos!


Unfortunately, we ran out of  energy (it was a Friday night after all) and with an hour drive ahead of us, we left before we ever found the Piglet Palace.  Oh well, it's an excuse to go back again next year!!!


Yeehaw!
xoxo,
Bee

Friday, September 18, 2015

The Book Nook...


Our latest home improvement project was by far my favorite.  It is a gorgeous built-in combination storage bench, firewood stand and bookshelf.  It completes our living space and entry way, adds seating space, balances the room and most importantly, it stores our stuff!

I, however, can only take credit for the painting and styling of the piece.  The ingenious design, planning and craftsmanship all belong to my handsome and talented husband (I am such a lucky girl!).

We went with a white paint, to keep the light and airy and clean look to the room.  In an effort to keep the piece from looking too polished, we left the edges of the shelving with only one coat, to reveal the woodgrain.  Afterall, this is a rustic mountain home!

When styling the books, I played around with size categorization, but ultimately went back to color coding them.  To me, it is the most appealing look.  Of course I mixed it up with both stacks and rows....even implementing our newly acquired arrow book ends! To jazz it up, I added our wedding "guest book" (a painted globe that guests signed...we have a thing for maps), spools of twine, a jar of sand from Lake Michigan, driftwood from Cape Cod, and more.
Bench completed, with shelving in progress

Ty doing what he does best!

Shelving going up


Genius--Shoe storage!

Love these arrow book ends


Happy building!
xoxo
Bee

Thursday, September 17, 2015

Succulent box centerpieces - How-To Guide

Today's installment of wedding goodness: CENTERPIECES!!!!!!

When designing our wedding I was very sure of a few things. The colors needed to be navy and hunter, I would wear a flower crown instead of a veil, and that I would be doing my own succulent center pieces.

I have always LOVED SUCCULENTS (despite my ability to keep them alive for more than a couple of months...I've been told that I over water, but I like to call it over-loving).  The colors, the depth and texture, their organic and hearty look, all so seductive, especially at a wedding.  

I knew for sure that I wanted to make each centerpiece a stand alone garden, that didn't require a lot of other decor or fuss in order to make the guest tables look "finished".  Because we were in a barn, I had my heart set on distressed wood vessels to plant them in.  Trying to be as economical as possible, my mom and I scoured the internet to find boxes.  However finding 15-20 large planter boxes was proving to be more difficult than we had anticipated.  Ultimately, my uncle, kindly offered to build them custom for us, which was more than generous.  They came out gorgeous at 30 inches x 8 inches x 6 inches, BIG BOXES!

Back in January, my mom offered to grow all of the succulents herself for the wedding, and I absolutely LOVED that idea.  After my mom passed away in April, I wanted to make sure to honor our collective vision for these centerpieces, but knew that with work, a cross-country move and other wedding plans without her, growing the succulents myself in time for the wedding was impossible. 

So my father and I decided to buy them instead and plant them together in her honor. So we set out to IKEA to get the bulk of the plants. Next I stopped at Winston's garden center in Newton, MA, for their upscale and stunningly beautiful inventory.  Each box would have 6 small various succulents from the IKEA selection, one aloe plant from IKEA (for height) and one stunner from the Winston's selections.

For bottom drainage we used recycled Styrofoam (lighter than rocks) and soil from our yard. Because the boxes were so long, and we couldn't stack them, we now needed a much larger vehicle in order to transport the centerpieces from Boston to New Hampshire.  So we rented a suburban and loaded her up!

Friday before the wedding we finished off the boxes bu adding some decorative moss to hide the soil. I chose to use 3 contrasting colors of moss to add depth to the look on the tables.  My father did a beautiful job finishing them off, and I was absolutely thrilled with how they came out.  

At the end of the night, we gave most of them away to guests, who took them home to decorate their own homes.  It makes me so happy when one of our beloved wedding guests sends me a photo of their box, now weeks after the wedding.  I love that they were not wasted and they are living on!

1. Start with your favorite selection of succulents from your local garden store (tip: Ikea and Home Depot have some really nice ones for a great price point ~ $2.50 each)
2. Pick your vessel: We used long rectangular distressed wooden boxes.  But use your imagination! I also really like the idea of using funky vintage mugs (li ke my darling friend Sonal uses for her gorgeous succulent babies!) milk glass candy dishes, glass globes and of course, mason jars!
The succulent babies ready to be planted in their new homes!
3. Before planting, make sure to fill the base of your vessel with drainage (we used styrofoam here to keep the boxes from being too heavy, but you could also use pebbles or gravel).  Fill with soil and then carefully transfer your succulents into the soil.  Make sure to soak them well after planting to help them acclimate to their new home :)
My dad planting in our back-yard
4. All planted! To dress them up, use moss (usually sold in bags at garden stores) or polished stones to cover soil.
Semi-finished product

The guard dog protecting the centerpieces on their way to New Hampshire!
These stunning detail photos of the finished centerpieces were taken by my dear friend and ever so talented wedding photographer, Taj Chin:


Happy planting!
xoxo
Bee

Wednesday, September 16, 2015

Kitchen stool make-over

When Ty and I moved into our Chicago apartment last year, I was pleasantly surprised with how nicely our styles came together. But one thing was missing, a dining area.

This has always been important to me in all of my apartments.  To have a place to sit and share a meal each day, like an adult.  Not sitting on the couch with my food on my lap, like I did in college. (I'm too messy when I eat for that). But small city apartment living often limits the space needed for a kitchen table and chairs.  

As usual, Ikea saved the day, by offering a very affordable pop-up, wall-mounted table.  It fit perfectly into our Chicago living room.  We mounted it high on the wall and used Ty's existing Target brand bar-stools as seating. Functionally, it was perfect, but aesthetically, I really wanted to update the stools with a lighter color.  Their reddish brown stain was too heavy for the small space and I longed to change them up. But ultimately we never did, because the logistics of painting furniture in a city apartment without a yard were too difficult.

Fast forward a year later, to me scanning through Instagram in a crowded airport terminal waiting to board a flight to New York. That was when I spotted these awesome color-block stools on Domino Magazine's account. Clean and simple, unique but approachable. I was totally re-inspired to makeover our stools as soon as I got home!


While I absolutely LOVE the idea of using gold for the accent color, it seemed rather glitzy for our little mountain hideout (plus I try to spare Ty from living in a super feminine space, and gold=girly). Since our kitchen is white and gray with natural blonde wood cabinets, I decided to use gray as the accent.


Our little dining area in the Washington kitchen with the stools in their original form
Obligatory "before" picture 

Supervisor Mae,  making sure I do a good job. 
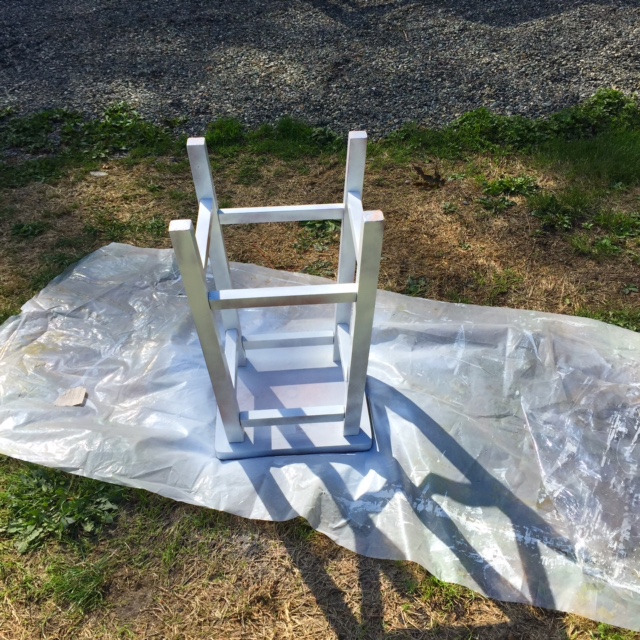
First coat of white spray done and looking good.

After completing a few coats of white, I moved onto the taping phase...which is when the disasters began.  The so-called "painter's tape" adhesive was too strong and actually ripped off the white coat, grrrrr! Meaning that I had to go back to Home Depot for some more white spray paint. 

The new can of spray paint came out differently than the previous cans I had used, and the flow was too thick, meaning that the paint bubbled and cracked.  To fix this, I waited until it was completely dry and sanded it off to repaint.  

The following day, I completed the project with the gray. However,  the previous day's tape apparently sprung a gap in between overlapping layers,  leaving plenty of room to allow the grey spray to leak through onto the white legs.  Which meant more time spent covering it up with white, yet again.  

I ran out of white paint and had to return to Home Depot a third time in as many days to get more spray paint. Ridiculous.

At this point I was thoroughly frustrated and DETERMINED to make these stools look awesome, based solely on the time spent making them over! All in all, I am very happy with the look of the stools and how they brighten up our breakfast nook in the kitchen (despite a few minor imperfections).

Lesson learned, I prefer brush paint to spray paint.

Post disaster, just one more coat on the top before they're done!

I am loving how the stools now compliment and brighten the space now!

Happy spray painting!
xoxo,
Bee


Thursday, September 10, 2015

Wardrobe RX
Labor Day Weekend has come and gone.  The sun has started coming up later and setting earlier. There is an undeniable change in the air...Autumn has officially begun in the Pacific Northwest.  This is my first Fall season spent here, and while I strive to maintain my East Coast style, my lifestyle here, atop a misty mountain ridge, will inevitably dictate some more functional wardrobe choices going forward.  Less heels more rain boots...you get the picture.

Time for a calculated and judicious adult wardrobe.  One that values quality over quantity.  If I don't LOVE it and it doesn't have a GREAT fit, don't buy it. I think that Fall is the perfect season to turn over a new leaf (hahah, pun intended).

With this in mind, I cleaned out my closet yesterday.  I was very disciplined this time around, being sure to let go of items I just don't wear anymore, no matter how much I loved wearing them when I was 28.  No matter how expensive they were (oops!).  I also took the opportunity to get rid of  the worn out stuff too.  You know, the items you keep for yard work, or to wear to bed.  I was like Elsa, letting it all go!

Now, how to fill the Fall wardrobe gaps?  I'm thinking lots of classic East Coast Prep mixed with Pac-Northwest approved flannel, denim and plaids.


Grey flannel skirt - J Crew Factory
Perfectly paired with feminine heels and a button down for work or with tall boots and a sweater for a casual weekend in the city.


Hooded Kasson Parka - Penfield
In the Nortwest they say "there is no such thing as bad weather, only bad gear". This Penfield parka is tough, weather proof and stylish to boot.  Oh, and Penfield is a Massachusetts based company: BONUS!

Red Rain Boots - Hunter "Original Tall" 
Now, I know that already have a very well-loved pair of Hunter Green Hunters.  However, given the length of the rainy season here (October- June) I think this red pair will come in pretty handy, and add some brightness to the foggy weather.


Intense Blue Plaid Popover - J Crew Factory
This shirt has all of my favorites - blue white and plaid.  Great worn with jeans and boots, tucked into that grey skirt mentioned above, or worn with slacks and layered with a statement necklace.


Plaid Boy Shirt - J Crew
Flannel, in the Northwest...need I say more?


Flannel Boyfriend Shirt - J Crew'
I adore this flannel, it is great for the transitional months of September and May with it's summer-ish colors.  But still cozy enough to look great under a heather grey cable knit in late November!


Super Soft Vest - Pink Pineapple Shop
These vests are AWESOME.  They layer well over flannels and long sleeve shift dresses on mild days, and are thin enough to wear under coats in colder weather.  I already have a collection (beige, red and buffalo plaid) from J Crew.  Last week, I found this version from Pink Pineapple Shop in Rhode Island for a much nicer price.  I ordered the army green. It  just arrived yesterday and the fit and quality is superb!


Bucket Bag - Pink Pineapple Shop
Any excuse to carry a big bag, I am especially drawn to the gold hardware on this timeless tote.  And the price can't be beat! Sure to be a favorite for years to come.


Tan Swing Trench - Vineyard Vines
Classic trench style with a swinging twist.  Not shown: the ADORABLE blue and white gingham details in the lining.  Perfect for those sunny and mild early fall days, this would look fab layered with chambray, black pants and a blanket scarf!


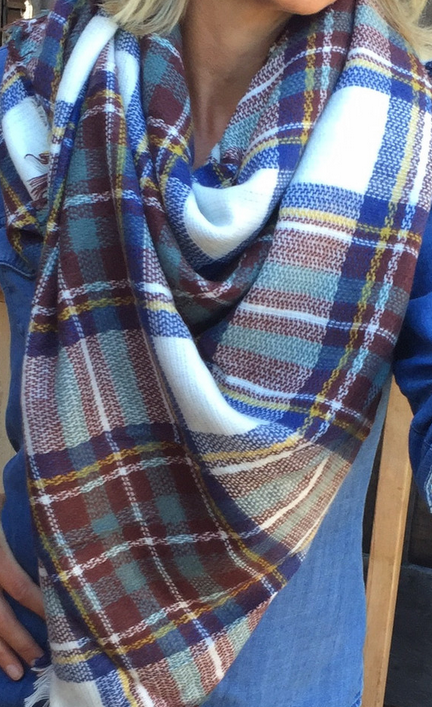
Blue Jean Blanket Wrap - Pink Pineapple Shop
The oversized scarf that everyone had last year just got a make-over.  This color palette is fresh and bright, and will be perfect for keeping cozy by the bonfire on a crisp October night.


Negev Shawl Cardigan - Anthropologie
Easy to wear, beautiful neutral tones and cozy to boot! Also, great for hiding your bum in leggings. Ladies, you all know what I am talking about!


Boyfriend Broken In Jeans - J Crew
I am really into destroyed denim, always have been.  This boyfriend cut from J Crew is great, slouchy but not baggy.  And I am a sucker for the  lighter brighter washes this season.


Plaid Shirtdress - Old Navy
This plaid shirt dress goes from work to happy hour in a snap.  I'd wear it with a popped collar, layered with a long cardigan and suede flats.  Transitions well into cooler days by adding olive green leggings or tights.


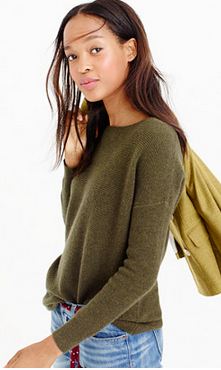
Ribbed Boatneck Sweater - J Crew
Soft, with great movement, this pullover is a great way to get that cozy look without adding too much bulk.


Neutral Striped Tunic - Old Navy
I have been on the hunt for a good striped long sleeve dress for fall.
Mix it up:
1. tall boots and anorak jacket.
2. Chuck Taylors, cropped jean jacket and baseball hat
3. suede driving shoes, quilted vest and long necklaces


Happy dressing!
xoxo
Bee